Uploading map imagery
Coreo allows you to upload GeoTiffs for use with your maps. This might be useful where you want to use specific imagery for sites including high resolution or precisely dated imagery.
Uploading your image
- First, navigate to the project you want to import imagery for.
- Navigate to the ‘Maps & Boundaries’ page.

- Under the ‘Custom’ section select ‘Import custom layer’.
- Select ‘Raster Image’ from the dropdown menu.

- In the ‘Map layer name‘ box type a name for your map image.
- Using the ‘Choose .tiff GeoTiff file to upload‘ button navigate to your file and upload it.
Note: Image data will be automatically resized to a maximum width and/or height of 4096 pixels.

Your image will now appear in the ‘Custom Layers’ panel.
- Select the ‘Magnifying glass’ icon icon to see your image presented on the map.

Viewing your map image in the Coreo app
- Making sure that you are in the relevant project in Coreo, sync your project, using the icon highlighted below, to pull down any pending changes from the server.

- Using the Layer Switcher icon, view the layers in your project.
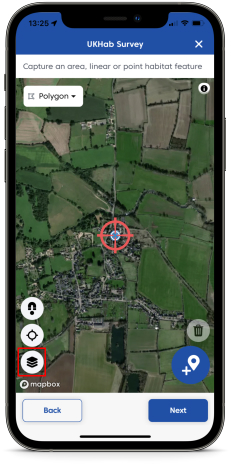
- Scroll to the bottom of the window until you see the Map Layers section.
- Make sure that your new map image layer is set to be visible.

- Tap back onto the map to dismiss the Layer Switcher and navigate to your new map image.

Was this article helpful?
Thanks for your feedback!